7 Proven Steps To Hail Damage Repair With Paintless Dent Techniques
Hailstorms can wreak havoc on vehicles, causing numerous dents and dings that can tarnish both their look and resale value. Thankfully, contemporary repair techniques such as Paintless Dent Repair provide a practical solution to rectify damage without resorting to sanding, fillers, or repainting. This guide will outline seven established steps for fixing hail damage using paintless dent methods, enabling you to learn how experts efficiently and affordably restore a car’s body to its original state.
Why Paintless Techniques Deliver Superior Hail Damage Repair
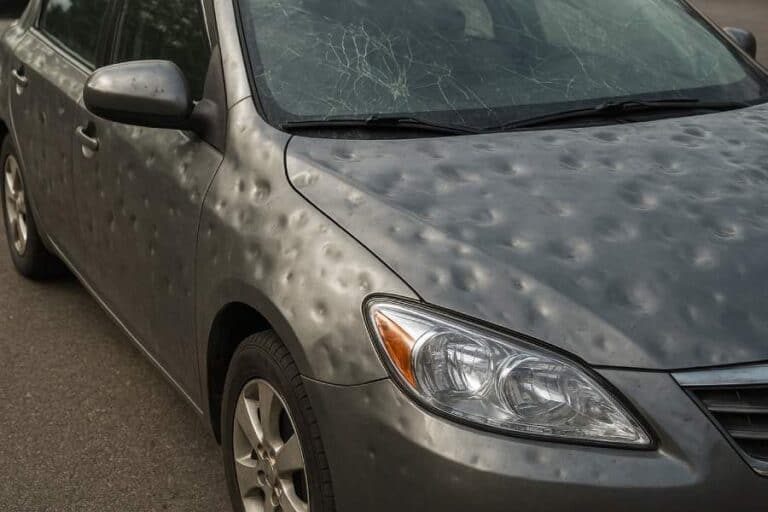
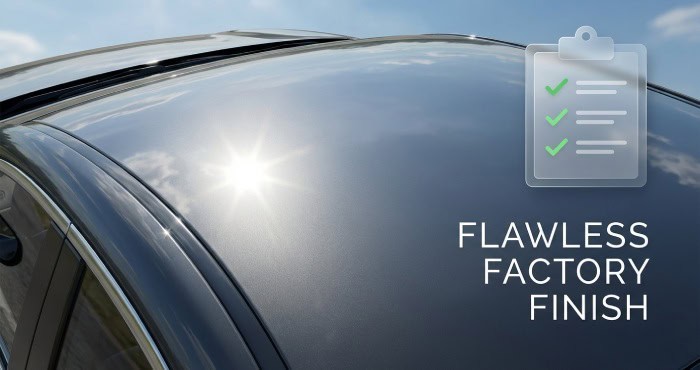
After a hailstorm, damage can range from minor dings to heavily peppered panels, and the most effective repair is paintless dent repair (PDR), which reshapes metal without repainting, preserving the factory finish and resale value. Experienced PDR teams in hail-prone areas like Denver and Dallas-Fort Worth often coordinate with insurance, offer valet or rental services, and provide free evaluations, professional repairs, and even lifetime warranties.
Customer reviews and case studies can give insight into costs and outcomes, while a step-by-step PDR framework ensures precise, efficient hail damage repair that keeps your vehicle intact.

Assessment and Planning
Step 1: Evaluate Hail Damage and Verify PDR Compatibility
- Carefully examine each dent, using tools like line boards, fog boards, or LED lights to assess metal deformation and to pinpoint crowns or minor low spots.
- Ensure that the paint and clearcoat are intact, and confirm that the metal has not exceeded repairable limits, as most minor, round hail dents are suitable for paintless dent repair.
- Capture detailed photos to document the dent count for insurance purposes and identify areas of significant damage, such as the hood or roof.
- Additionally, mark any previously repaired or repainted areas, as these will behave differently during the dent repair process.
This assessment serves to inform the vehicle owner about available repair options, estimated costs, and timelines.
Step 2: Develop a PDR-Centric Repair Strategy and Cost Estimate
- Prioritize panels according to the severity of dents and ease of access, employing push-from-behind methods where tools can be utilized and resorting to glue pulling in areas obstructed by braces.
- Choose the appropriate PDR equipment, including rods, dent pullers, blending hammers, and heat applications for tough or aluminum panels.
- Collaborate with the insurance provider to ensure insurance coverage, obtain rental approvals, and adhere to inspection protocols.
- Create a detailed estimate that accounts for any necessary trim removal, access to the headliner, and potential additional inspections.

This approach yields a structured repair strategy focused on preserving the original finish while minimizing repair duration.
Access and Metal Movement
Step 3: Prepare the Vehicle and Gain Access for PDR (R&I trim/headliner, protect airbags/wiring, clean panels, mark dent locations)
- Perform careful R&I: drop headliners, remove tail lamps, and release inner shields to expose tool ports. Protect airbags and wiring harnesses with covers and disconnects as recommended by service data.
- Clean exterior car panels so reflections reveal subtle lows; grease pencil mark dent locations and crowns. This keeps the PDR process efficient and avoids missed dents during hail damage removal.
- Organize tools: A Paintless Dent Repair Kit for glue-pulling, precision rods and tips, knockdowns, blending hammers, heat guns, and alcohol release agents. A quality dent repair kit accelerates workflow and consistency.
- Stage panels in logical order roof, hood, trunk so the repair program progresses from heaviest impact areas outward.
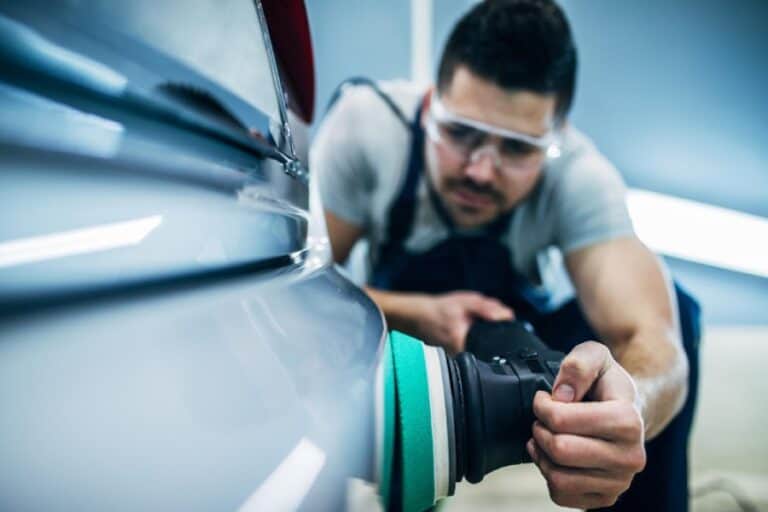
Step 4: Execute Push-from-Behind Techniques on Accessible Dents (choose tips, establish leverage, read reflections for controlled metal movement)
- Select tips matched to dent size and metal type. Start with softer tips to lift the center without spiking; move to sharper tips for tight, deep lows common in severe vehicle hail damage repair.
- Establish stable leverage using braces, adjustable bars, or window wedges. Read the line board reflection constantly; micro-lifts and resets control metal memory and avoid overcorrection.
- Work from the perimeter inward to relax crowns, then sculpt the center. For car hail damage with dense clusters, alternate panels to manage heat and technician fatigue, which improves ding removal quality and speed.

Step 5: Apply Glue-Pulling Methods for Hard-to-Reach Areas (tab selection, pull angles, controlled lifts, alcohol release, crown management)
- Tab selection: Match tab size and shape to the dent footprint; flexible tabs for shallow, wide lows and rigid tabs for small, sharp hits.
- Pull angles: Keep in-line with dent direction to prevent lateral distortion. Use slide hammers for rapid energy and mini lifters for incremental control.
- Controlled lifts: Lift in stages, chasing micro-highs with a knockdown before re-pulling. Alcohol release quickly resets tabs without smearing glue on the factory finish.
- Crown management: Read the reflection for tension rings; soften with precise knockdown taps before the next pull to avoid chasing oil-cans.
Glue-Pulling Control Checklist
- Verify panel temperature for optimal adhesive bonding.
- Use a calibrated dent puller and lifter feet padded to protect paint.
- Alternate pulls and knockdowns to keep the PDR process balanced.
Finishing, Reassembly, and Quality Control

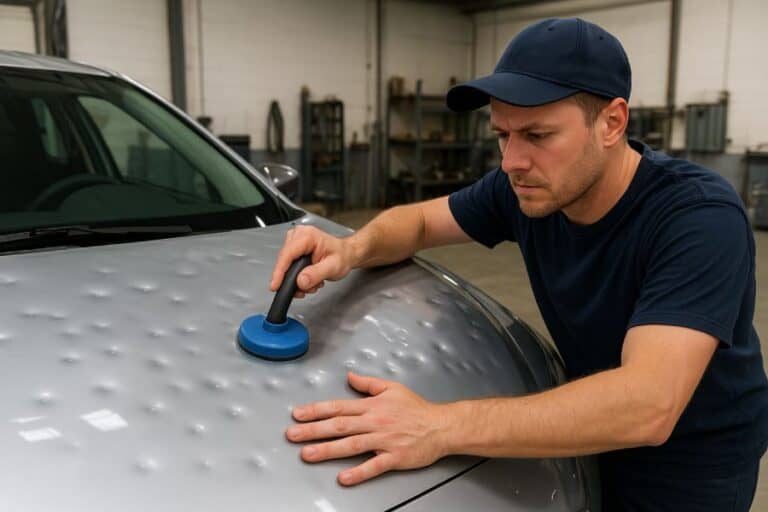
Step 6: Achieve OEM Texture
- Utilize careful tap-down techniques with smooth knockdown tools to eliminate micro-high spots while avoiding pits, ensuring the tool hardness complements the paint.
- Use blending hammers to softly taper the surrounding texture, maintaining a consistent orange-peel paint effect across the surface.
- Monitor the panel’s temperature to ensure stable metal behavior in varying weather conditions.
- Check thoroughly with different light sources to confirm the absence of micro-low areas, aiming for an unnoticeable, factory-like finish.
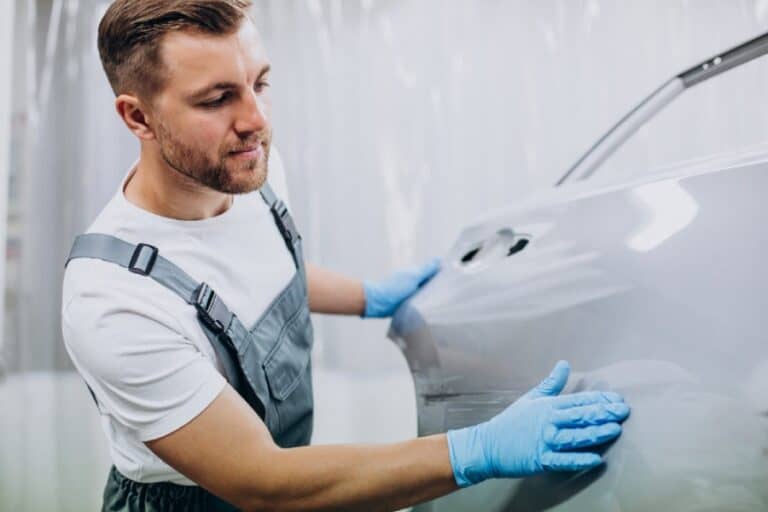
Step 7: Reassemble, Conduct Quality Assessment, and Safeguard the Finish
- Reattach all trims, clips, and the headliner, confirming they align as per factory specifications.
- Test any airbags and electrical components, followed by a thorough inspection under light boards and natural light for overlooked dents.
- Apply a gentle polish, document the outcomes, and provide recommendations for aftercare, including parking in a garage and weather precautions.
- Collaborate with the insurance provider to complete claims, clarify repair costs, highlight the lifetime PDR warranty, and present options for future assistance such as quick intake or valet service.
Throughout these seven steps, the emphasis remains on hail damage repair that prioritizes paintless dent repair techniques and the PDR process. Executed correctly, this approach delivers fast, precise hail damage removal for car hail damage, retains original factory panels, and ensures vehicle hail damage from even the fiercest hailstorm is corrected with minimal disruption to your life.